I’m sure somewhere, somebody tired to update ROS (the operating system/Firmware of RouterBOARD) and the update ended up bricking your device. Now your device is in a bootloop (reboots every 15/30 seconds.) and you don’t know what to do.
Netinstall is used for recovery and re-installation of ROS.
Step 1 - Finding Your ROS
Finding the right ROS (architecture/firmware) for your device, you can check your device in Windbox

Or on the Mikrotik Website

Once you have found your ROS, download it and Netinstall from the Official Website or from Ctwug’s File Downloads
Step 2 - Configuring Your PC/Laptop
Disconnect your computer from WiFi, Additional Ethernets, LTE or any other type of connections [Tip - disable them for good measure it helps some times.]

Now assign an IP to your Ethernet device. (Leave rest of the settings blank) [Once this tutorial is complete your going to open your RB in Windbox so this IP won’t matter, as you can connect to the MAC address from Windbox.]
Example

Step 3 - Configuring Netinstall
Make sure Netinstall is running in administrator mode.

Run Netinstall and and allow it to pass through your firewall. [Tip - I find it best to just disable your firewall for the time been.]

Fill out the client IP address and enable Boot Server.

Step 4 - Getting your RB to show up on Netinstall.
Before powering up the bricked RB, make sure your connecting your device to your PC/Laptop directly using an Ethernet cable, also this needs to be port1/lan1 (without any other devices in-between example switch or rb.) RB->PC
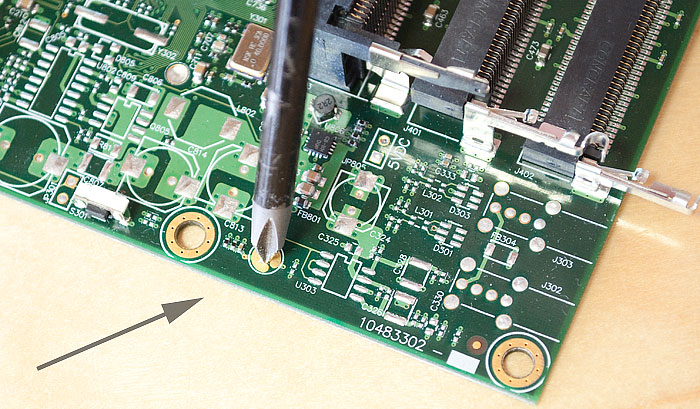
4.1) Your going to put your RB in Etherboot mode, depending on the model, by simple holding the reset button/putting a screw driver into it [Jumper reset for older models] (gently please because some guys have bricks for hands you don’t want to physically damage your device now).
Examples
SXT

Older Models
RB (Switch Type)

4.2) This step can take anywhere between 15 to 30 seconds or even 30 tries.
Now keep the reset button down while plugging the power cable back in. The LEDs will start blinking wait until all the LEDs are turned off (exception is the Lan1/Port1 LED and Power LED) let go of the reset button once this has happened, this will reboot you RB into Etherboot mode, you will hear a beep sound that will indicate it has rebooted.
If all went well your RB will show up in Netinstall.
Example - also your MAC address might not show up always (because the RB is bricked)

Step 5 - Installing ROS/Firmware
Browser to the folder where had download the ROS package (npk) and tick the version you want installed. [Tip - it’s good have both the bug fix version and the current version of ROS, just in case one doesn’t work.]


Tick apply default config as it would reset the device to it’s factory settings.

Then Click install. [Tip - if it doesn’t install, leave the RB in the Etherboot state, just close Netinstall and open it up again, it should install then.]


Once the installation has completed the new versions of Netinstall will reboot the RB by itself but you can hit the reboot button if it shows up on Netinstall.
![]()
And your all done I hope this tutorial was helpful.


